Ipe Clip® Hidden Deck Fasteners make installing a deck Quick & Easy. When you use our fastening systems your deck will be free of splinters, nail/screw holes, and all visible fasteners. Our fasteners are available in three U.V. resistant colors to match any decking material. The fact that Ipe Clip® Hidden Deck Fasteners are also available with a stainless steel insert molded inside them makes them the most durable fasteners on the market today.
Our installation process is Quick & Easy because all the work is done from the top-side of the deck so there is no need to stand on your head during the installation of the deck.
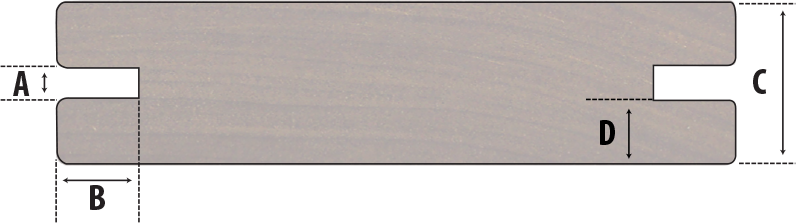
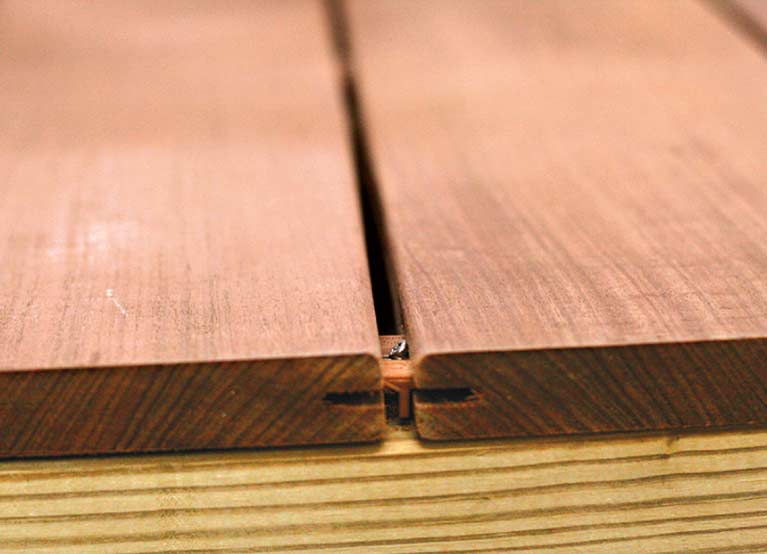
The installation process is made even more simple because our Hidden Deck Fasteners automatically set 3/32" or 1/4" spacing between the installed deck boards. No gap space measuring is needed when you choose Ipe Clip® Hidden Deck Fasteners. The reason for this is because different decking materials require different gap spacing. For example kiln dried or composite material will expand on its width so a larger gap space between boards is required. The Ipe Clip® ExtremeKD® Hidden Deck Fasteners are the perfect choice for decking material that expands on its width.
Before Installation Is Started
Look over all installation instructions that were provided with the decking material that is to be installed. Ipe Clip®
Hidden Deck Fasteners were designed to be used with almost EVERY decking product on the market today. But, you should always check with the manufacturer/ distributor of your decking material to make sure
the decking material that you are installing is compatible with the Ipe Clip® Hidden Deck Fastener System. Finally, we recommend that the decking be stored on the job site until the decking
reaches the appropriate moisture level of the installation area.
Are you still not clear on how many fasteners you need? Our Coverage Calculator is online to help you determine how many Ipe Clip® Hidden Deck Fastener
you need for you decking project.
https://www.ipeclip.com/decking-product-coverage-calculator
Installation steps below are for hidden deck fasteners only and are for illustrative purposes. Do NOT build directly on the ground! Decking designs should always follow local building codes and use proper ventilation underneath to ensure correct tolerances are met.
We always recommend an 18 inch minimum of open air under joists with open sides to ensure proper cross ventilation for all climates. Any skirting installed should not impair cross ventilation and never allow water to pool or stand under the deck. Installation over concrete should be avoided as well due to moisture retention possibilities.
It is your responsibility to ask your wood supplier for proper installation methods in accordance with the wood species best results. Always contact your local building department prior to beginning to design your deck project. Your local building department (and/or HSA, Homeowner Association) can advise you of zoning ordinances, including building codes which specify how and where you can build your deck. You alone are 100 percent responsible for applying for, and obtaining, any and all essential permits for your decking project.
Step 1: Installing the First Board
Apply a bead of exterior construction adhesive to each joist, approximately 3/8" in width. (This is an optional step, but it is recommended) Use a 1/8" drill bit with a 3/8" countersink to pre-drill a hole for the initial face driven screws. All Ipe Clip® Hidden Deck Fastener complete systems have a 1/8" High Speed Drill Bit included in them.
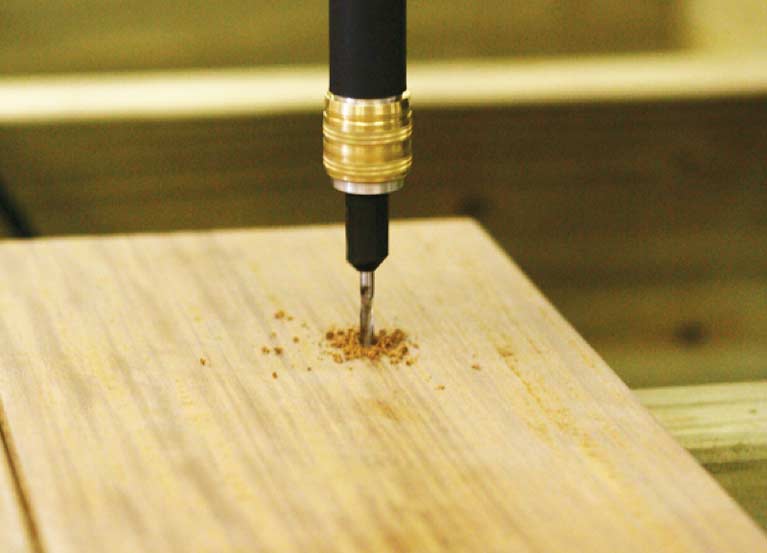
Step 2: Installing the First Board (Cont'd)
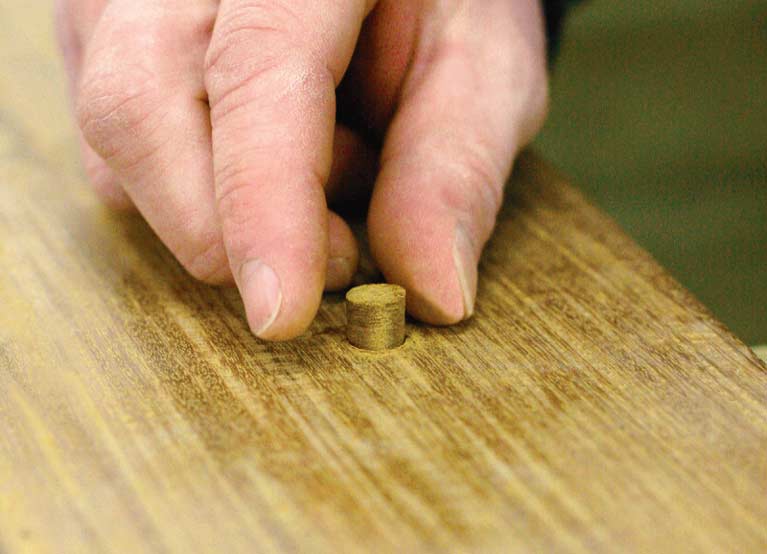
Glue and insert an Ipe Clip® 3/8" Tapered Ipe Plugs into each countersunk hole from steps 1 & 2. After the glue on each plug has set, remove any part of the Ipe plug that protrudes above the deck board. You can accomplish this by using a small saw or belt sander.
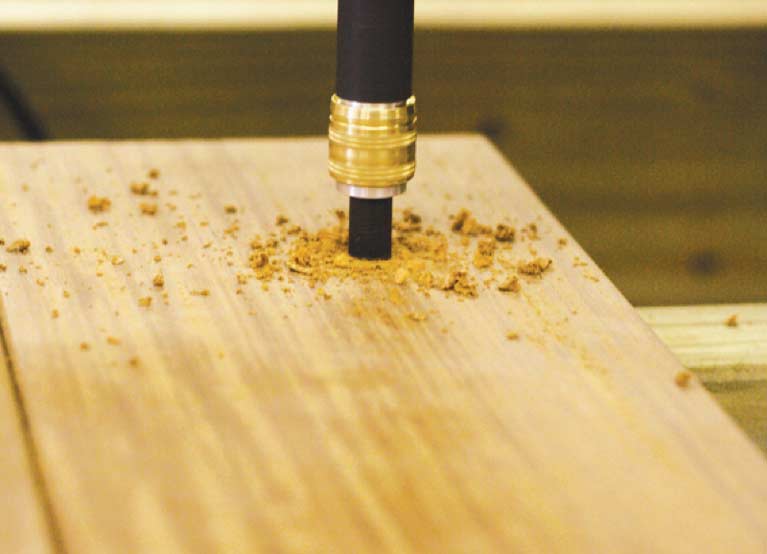
Step 3: Plugging the Face Screwed Boards
Install the initial face screws for the first board. All Ipe Clip® Hidden Deck Fastener systems have Stainless Steel T10 - Star Drive Screws included in them.
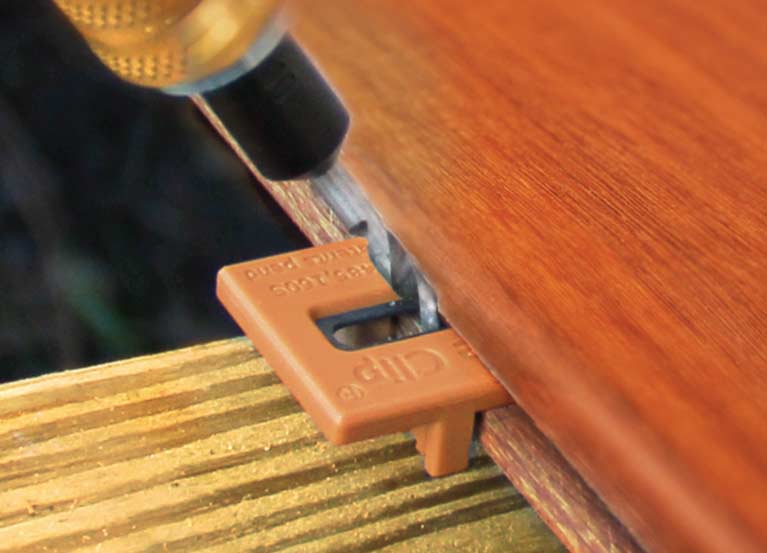
Step 4: Cut slots for Ipe Clip® Fasteners
If you are not using pregrooved decking, use a biscuit jointer or a router to cut a slot in the edge of deck board above each joist. Assure that the slot height is such that the bottom tab of the Ipe Clip® fastener lies just above the joist. It is recommended to apply a small amount of construction adhesive on the joists as deck boards are installed.

Step 5: Insert & Predrill a Pilot Hole (Hardwoods Only)
Insert Ipe Clip® fasteners into the groove on edge of the deck board. Drill a 1/8" pilot hole at a 45° angle for each screw when installing Ipe Clip® fasteners on hardwood decking. This is to avoid splintering and to make sure the decking is pulled tight to the joist by the screw in the next step.
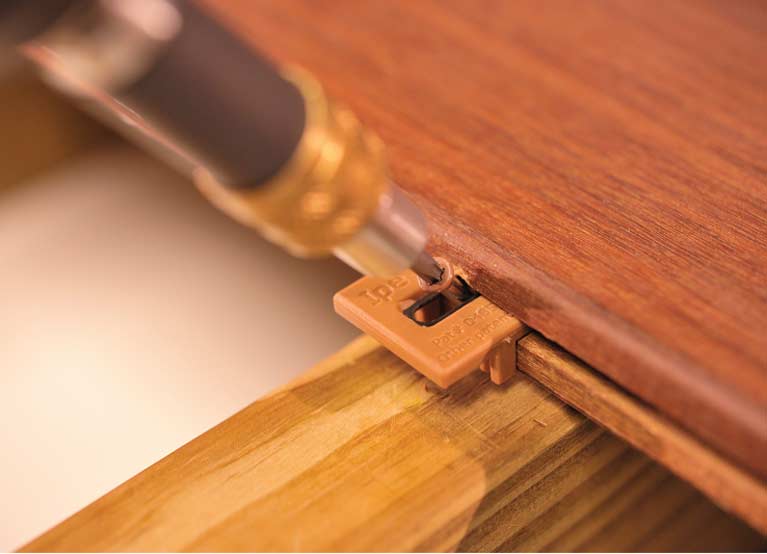
Step 6a: Screwing Ipe Clip® Fasteners (Hardwoods Only)
Run the stainless steel screws at approximately a 45° angle through the hole in the center of the Ipe Clip® fastener, through the deck board, and down into the joist. The head of the screw should be flush with the surface of the Ipe Clip® fastener. Fasten each board using one clip and one screw per joist. Where two boards meet on a single joist, only one fastener is needed. Sometimes it will be necessary to predrill pilot holes for the screws when using denser hardwoods.
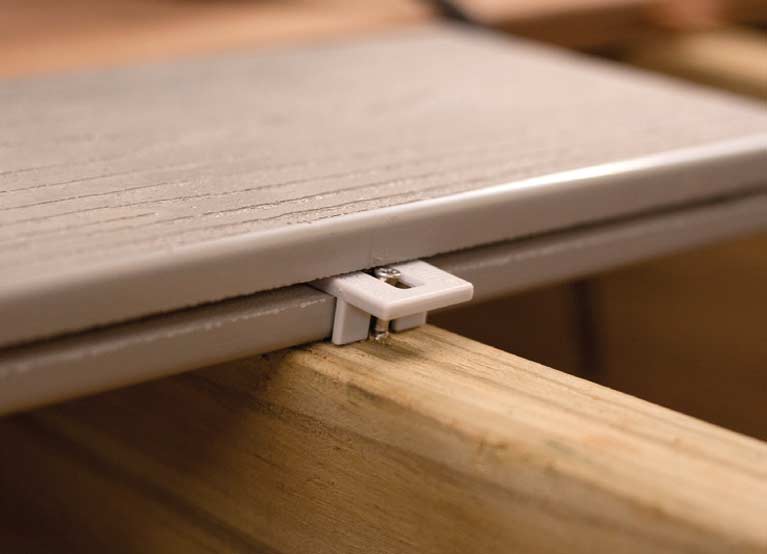
Step 6b: Screwing Ipe Clip® Fasteners (Composites Only)
Run the stainless steel screws straight down through the center of the Ipe Clip® fastener and into the joist. The head of the screw should be flush with the surface of the Ipe Clip® fastener. Fasten each board using one clip and one screw per joist. Where two boards meet on a single joist, only one fastener is needed.
Step 7: Installing the First Board (cont'd)
Installing deck boards over exposed side of the Ipe Clip® fastener. Again, if pregrooved decking is not being used, use a biscuit jointer or a router to cut a slot into the edge of the next deck board above the joist. Slide this board onto the Ipe Clip® fastener protruding from the previously fastened deck board.
**When using Ipe Clip® ExtremeKD® fasteners you can use the spacer tools provided to ensure that you do not crush the leg of the fastener while keeping your deck boards tight. Remove spacer tools as soon as deck board is fastened.**
REPEAT STEPS 2-7 UNTIL ALL DECK BOARDS ARE INSTALLED UP TO THE LAST BOARD
Step 8: Last Deck Board
On the last board it is necessary to fasten the outside edge by surface screws. These screws can be concealed by countersinking a 3/8” hole and using the wood plugs supplied. It is also recommended to apply a small amount of construction adhesive on the joist for the last deck board.